Windows is the most popular operating system on the internet. Most of the work people and students like to use this operating system as default. Bust some of the times windows users faces problem with their system. So windows users worry about this kind of problem on their system. The system error code 1231 is the most recent problem shows on windows 11. This is easy to fix this problem with your system.
There are many ways available to fix this problem on your system. The following methods are more helpful to fix this problem on your windows system. You can easily apply the following methods on your windows 11 operating system. Those methods won’t affect your personal data and files on your system. So you can try that on your windows 11 operating system. I will show you how to fix Windows error code 1231 on windows 11. Just apply all the following methods on your windows 11 system.
Also ReadYou can get the Roblox FPS unlocker application for free. This one helps to improve your gaming performance smoother. Just try this application you might like this.
Disable & Enable Network Driver
The system error code 1231 is mostly caused for the network driver. If you are facing this problem. you must try this method on your windows 11 system. This is most helpful to fix this problem on your smartphone. Just apply the following steps on your windows system. This won’t affect your personal files.
- First open the Run application by pressing the Windows Key + R buttons on your keyboard. Then type devmgmt.msc on the search bar. And click the OK option.

- Then find the Network Adaptors in the list and Expand that option.

- Now right click on the Wi-Fi Network Driver (If you use Wi-Fi as an Internet). Then select the Disable Device option in the list.

- Next click on the Wi-Fi Network driver and select the Enable Device option.
- Now check your windows 11 system. It will fixes that problem.
Network Troubleshooter
There are many troubleshooting options are available on the windows system. If you face this problem on your windows, you must try this method on your system. This troubleshooting method will fix this problem on your windows system.
- Open the Start Menu and click on the Settings application on that list.

- Then scroll down and find the Troubleshoot option in the list. And open that option.

- Now click on the Other Troubleshooters option in the list.

- Next you will see the many troubleshooters in the list. Now find the Network Adapter in the list and click on the Run option.

- Now you will see the dialogue box appears on your screen. Then click the repeatedly Next option on that dialogue box.
- After that, just restart your windows. Then check your windows. It will be working.
Using Command Prompt
This is the most easiest method on your windows system to fix this problem. You can easily fix the problem using some of the commands on your system. So just apply the following commands on your windows system.
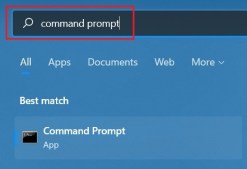
- First open the Start Menu and search command prompt on the search bar. Then you will see the Command Prompt application.

- Then click on the Run as Administrator option in the list.

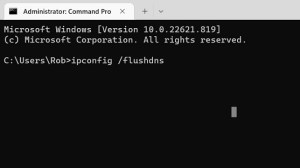
- Now enter the following command on your command prompt system.
ping google.com
- If this command shows the reply message, just restart your windows. If that command didn’t shows the reply commands, just enter the following command.
ipconfig /flushdns

- After that, just connect your internet and check your windows system. It will work.


